


In lesson 2 we learned about setting up the model, Physics definition, mesh generation and setting up initial condition. In this lesson we will go through setting up the output request and running simulation.
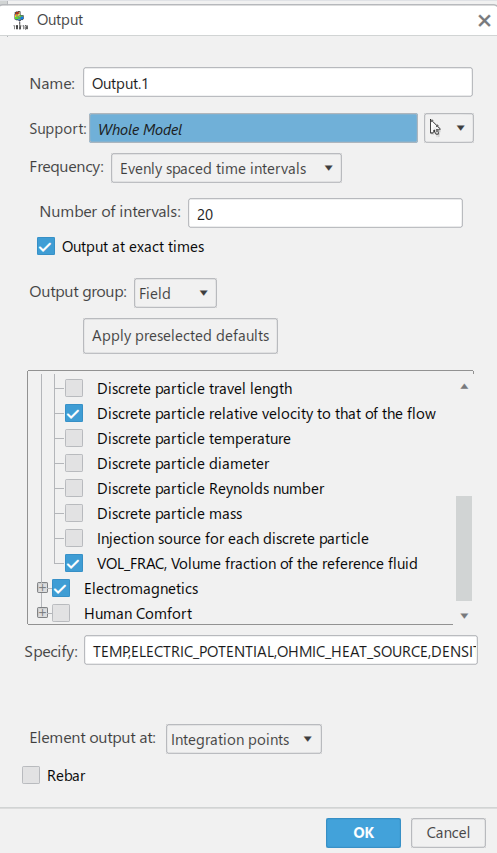
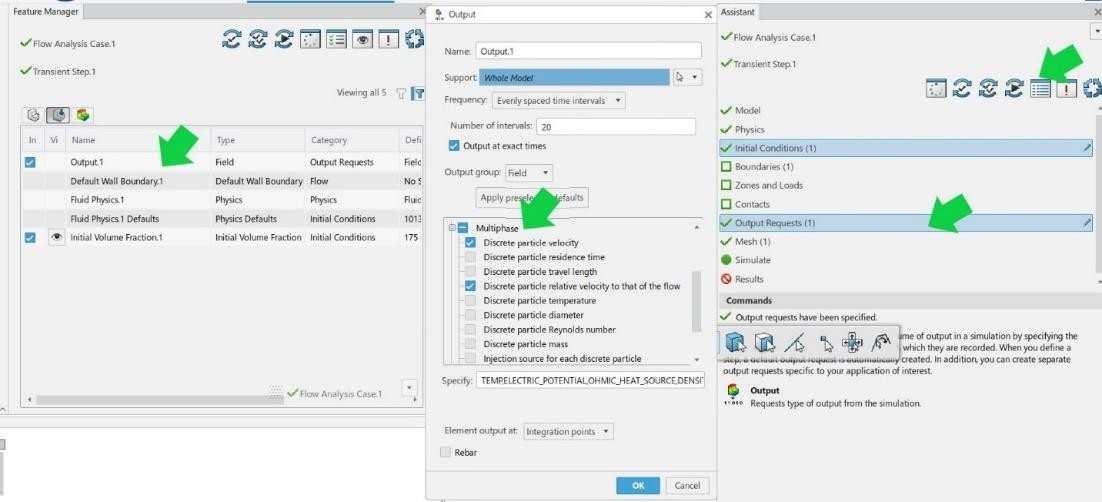
Before going into simulation, please check the output request. The parameters we want as output can be requested in this section. Click on output request and then click on feature manager in the top right of assistant. The feature manager shows all model and scenario setups that have been defined. Double-click on output 1 which is generated by default. Please note that for the whole model field output is created. Make sure that multiphase and ‘VOL_ FRAC’ is checked.
Before going into simulation, run the model and scenario checks to confirm there are no errors in the simulation setup. Click on the model and scenario check in the assistant (single tick mark) for the same. The check will be processed, and it will show that model and scenario checks are completed with a green arrow. Click ‘ok’ then.
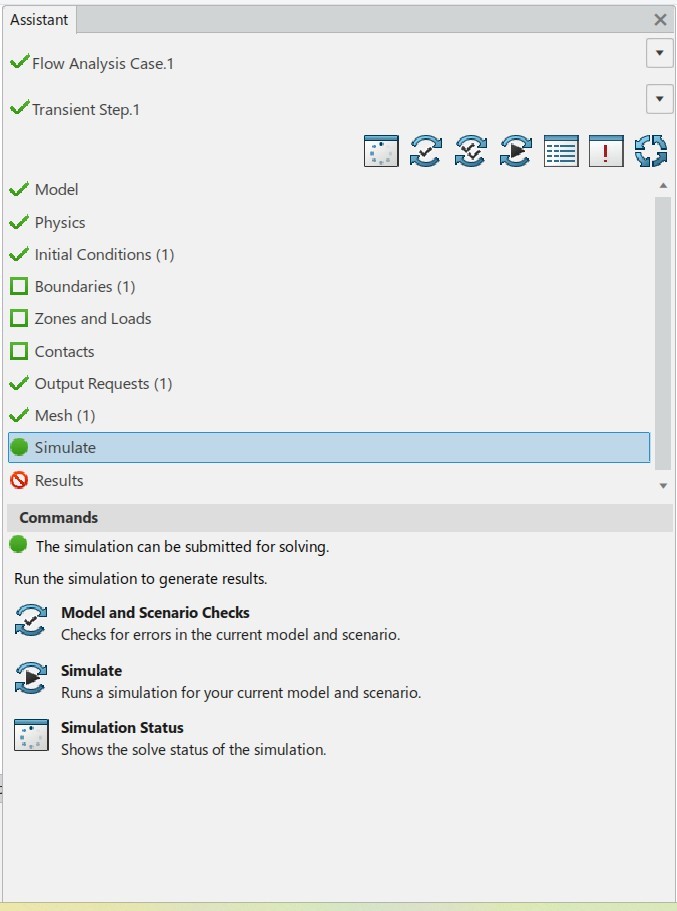
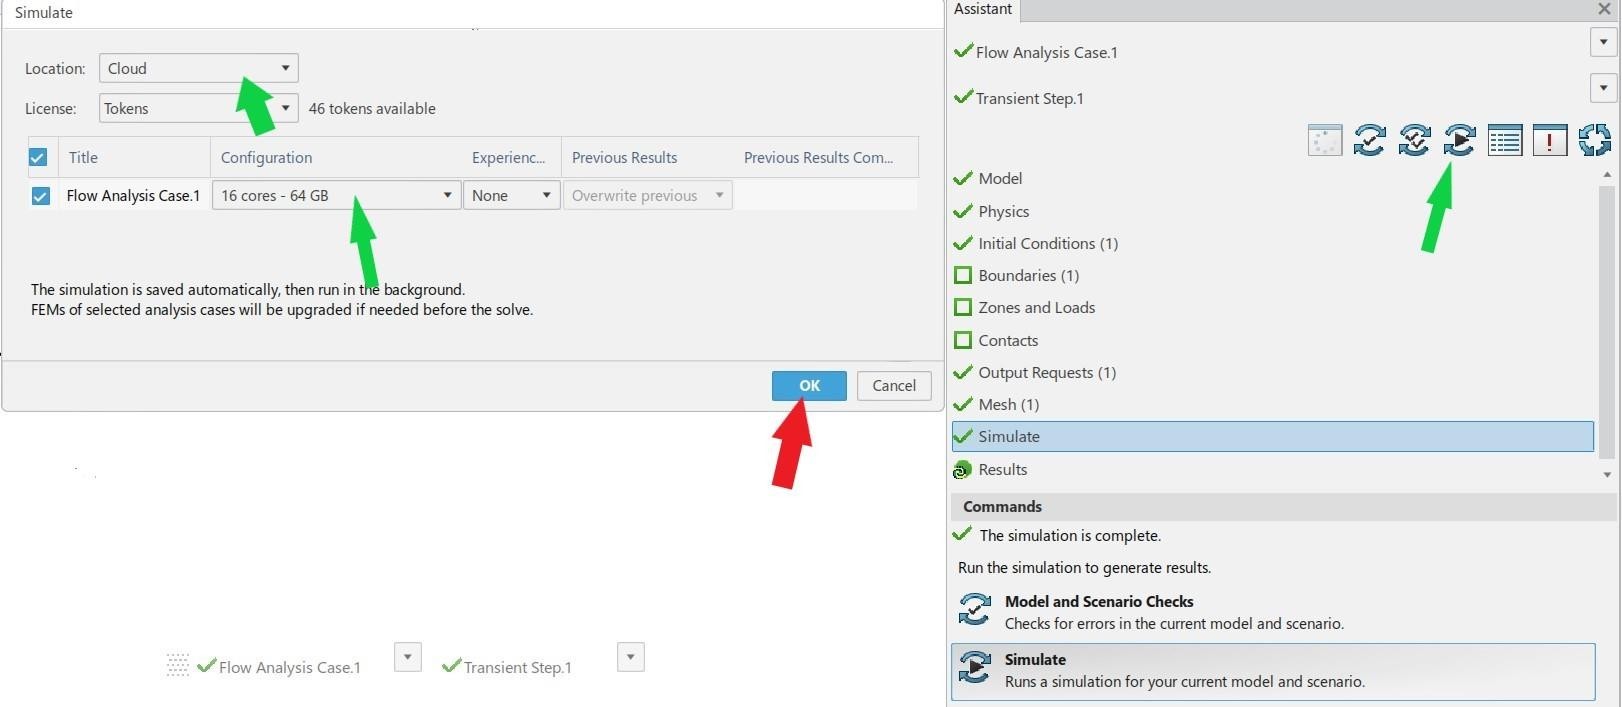
Moving on, the simulation must be carried out now. Click on simulate button on the top of assistant as shown in figure below. The simulation window will be open now. The prime advantage of fluid dynamics engineer is the cloud computing facility. You can run the simulation in cloud using by default available 16 core (for more core, you must purchase tokens) or else by making use of maximum cores available in your system. Click ‘ok’ then and simulation starts now.
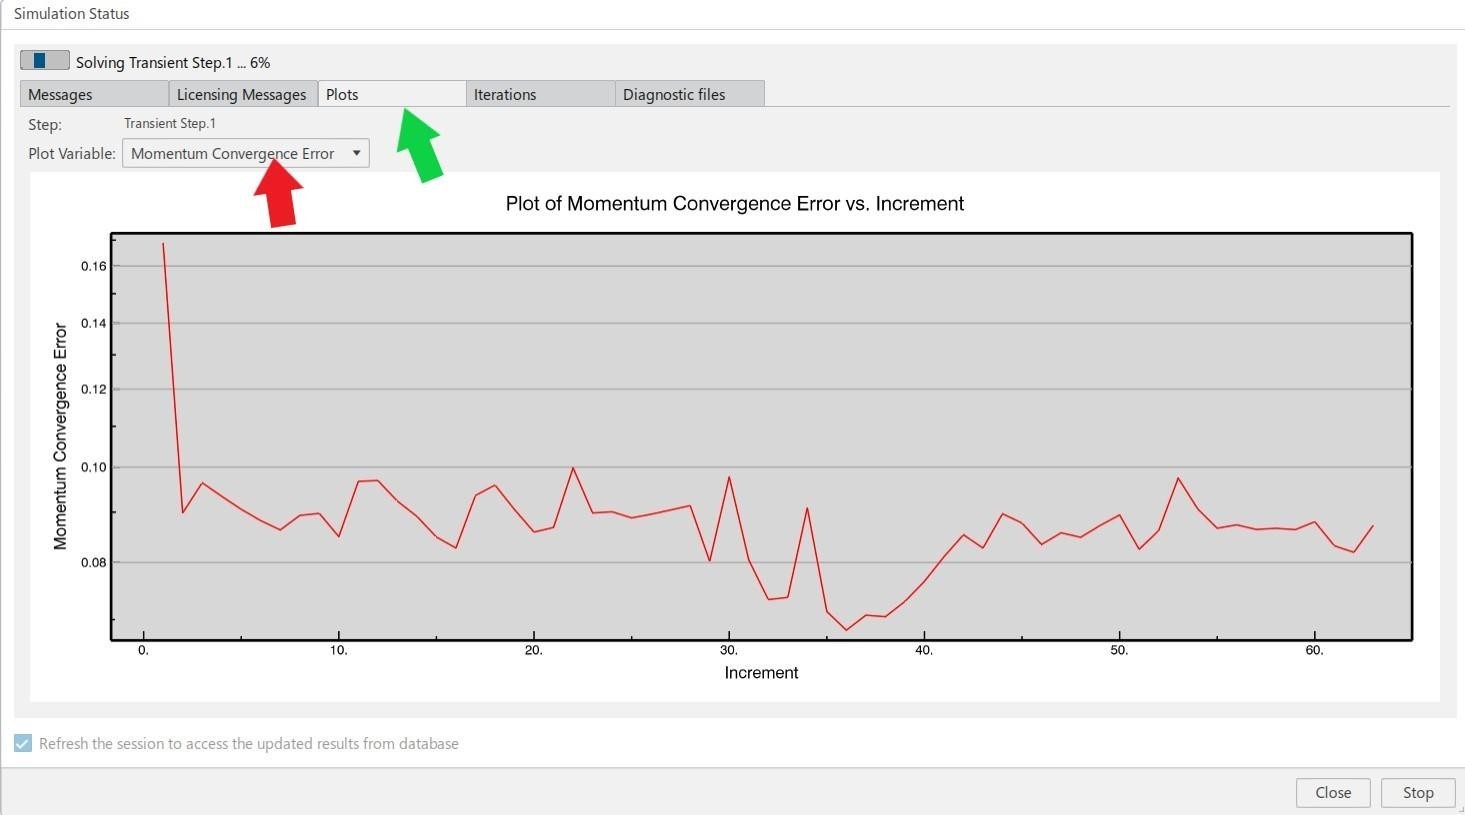
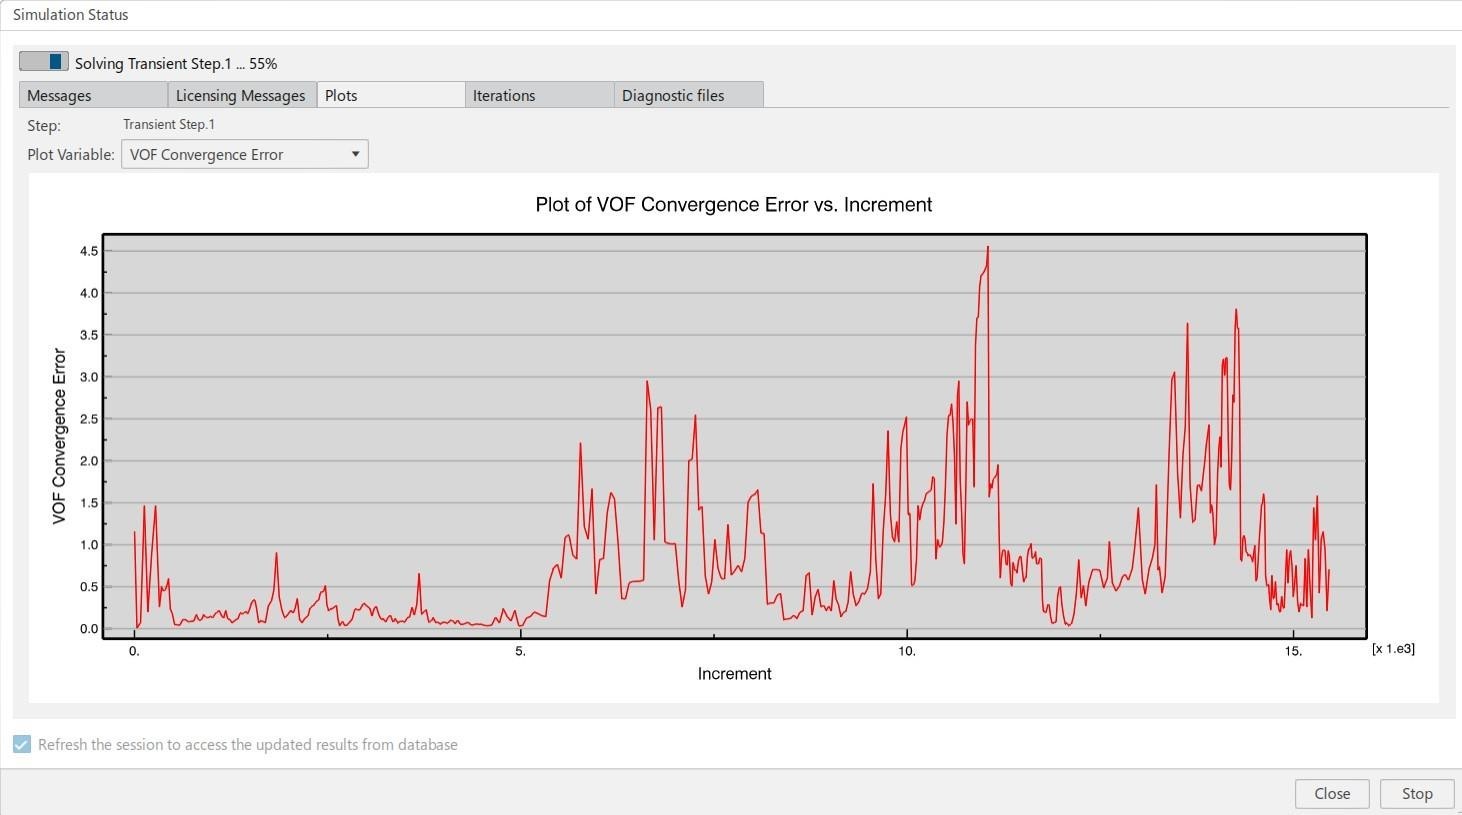
The simulation starts and it will take some amount of time to acquire cloud resources based on the speed of your internet connection. You can monitor different errors and residuals with respect to time in the plots section. Now wait for completion. The advantage of cloud computing is that you can close the simulation window and check after some time in the simulation status button in assistant (left to model and scenario checks). Also, you can stop the simulation in between by clicking on ‘stop’ button.
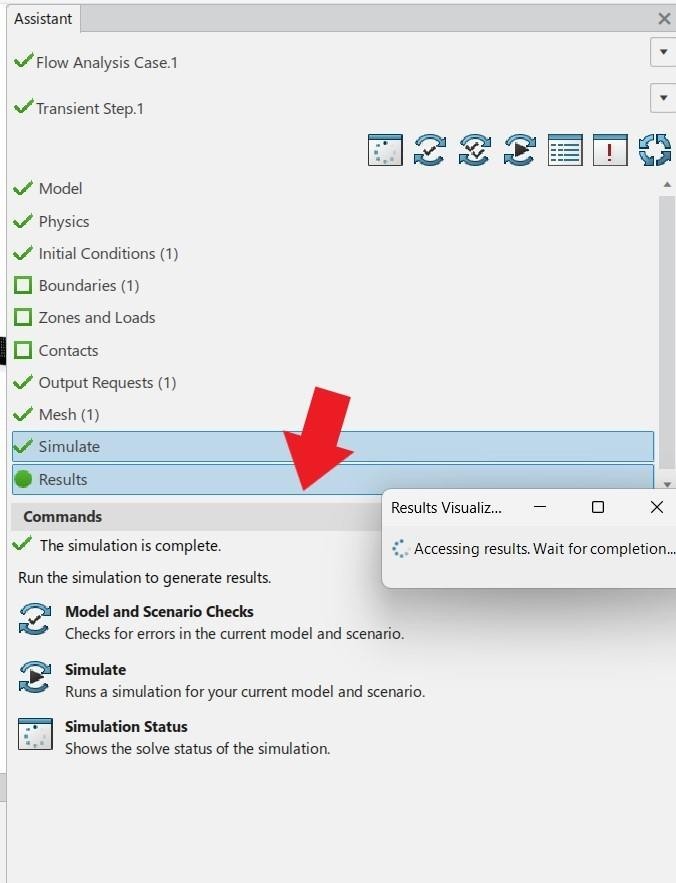
After completion, you can close the simulation window and click on results for the post processing.
Lesson 3 is finished.
We Urge You To Call Us For Any Doubts & Clarifications That You May Have. We Are Eager to Talk To You
Call Us: +91 7406663589
 (No Ratings Yet)
#365/8, Ground Floor, "Hasmitha Avenue", 16th Main, 4th T Block East, Jayanagar, 4th T Block East, Pattabhirama Nagar, Jayanagar, Bengaluru, Karnataka 560041
Rated 4.7/5 with a total of 62 reviews
#1120, 11th Floor, Solitaire business Hub - Baner, Balewadi High Street, Baner, Pune-411045
Rated 4.7/5 with a total of 17 reviews
801, 8th Floor, LODHA Supremus, I-Think Techno Campus,Kanjurmarg EAST - MUMBAI, MH, India – 400042.
Rated 5/5 with a total of 51 reviews
501, 5th Floor, Connekt Coworking Space, Gala Argos, Netaji Rd, Ellisbridge, Ahmedabad, Gujarat 380006
Rated 4.1/5 with a total of 7 reviews
Best Engineering Aids & Consultancies Pvt. Ltd. No 306, Karunaa Conclave, 3rd Floor, AD Block, Shanthi Colony, Anna Nagar, Chennai - 600040
Rated 4.6/5 with a total of 16 reviews
Flat no F1, first floor, Nakhate corner, Eknath rang mandir road,New Usmanpura, Aurangabad, 431005.
A-101, 1st Floor, The Hub Complex, opp. Shete Hospital, Mahatma Nagar, Parijat Nagar, Nashik, Maharashtra 422005.
Best Engineering Aids & Consultancies Pvt Ltd (BEACON) Wellwork Workspaces, L1 - 1017A,B, Lower Ground Floor,Vasavi MPM Grand, Ameerpet, Hyderabad, Telangana 500073
2nd floor, Mokha Tower, Plot No.169, Mankapur Ring Rd, Trimurti Nagar, Nagpur, Maharashtra 440022