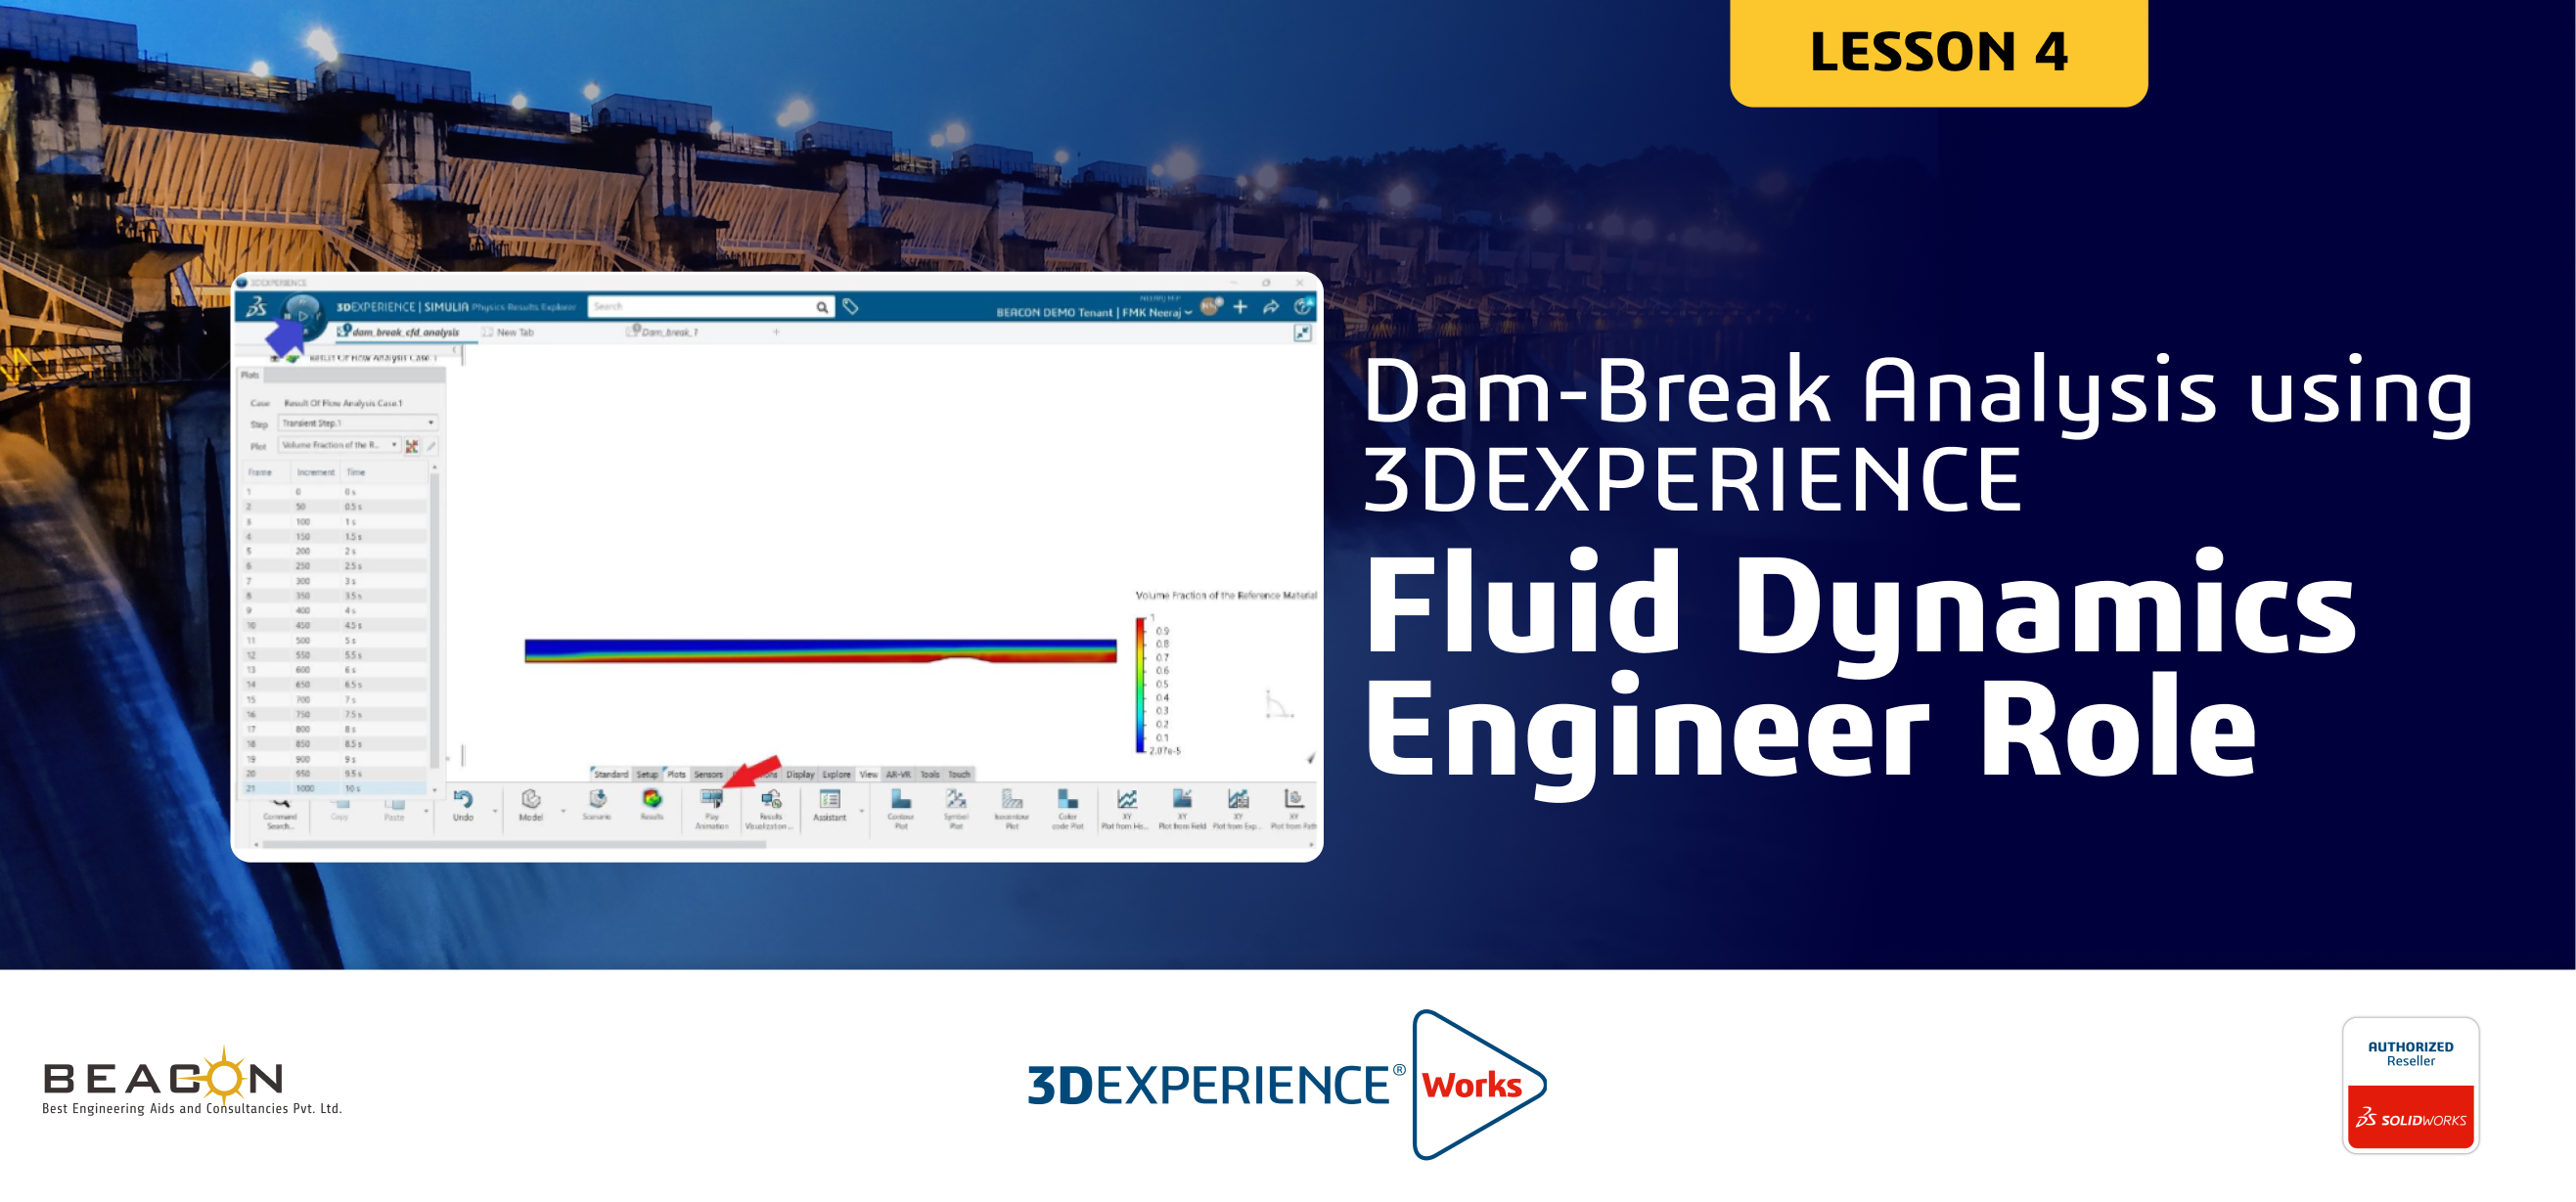


Up to lesson 3 we have learned from transferring SOLIDWORKS model to 3DEXPERIENCE platform to running the simulation. In this lesson we will go through post processing and results validation.
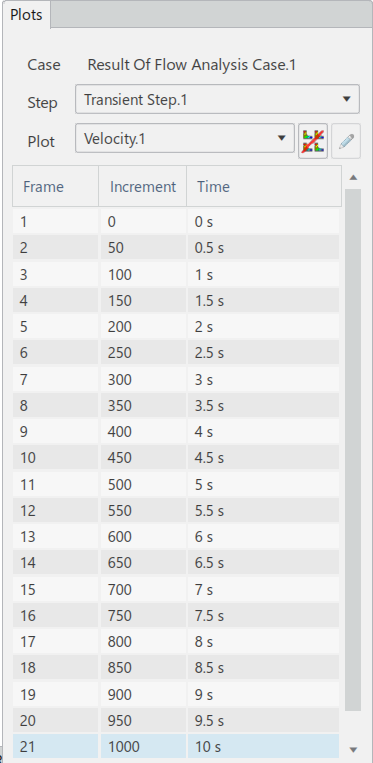
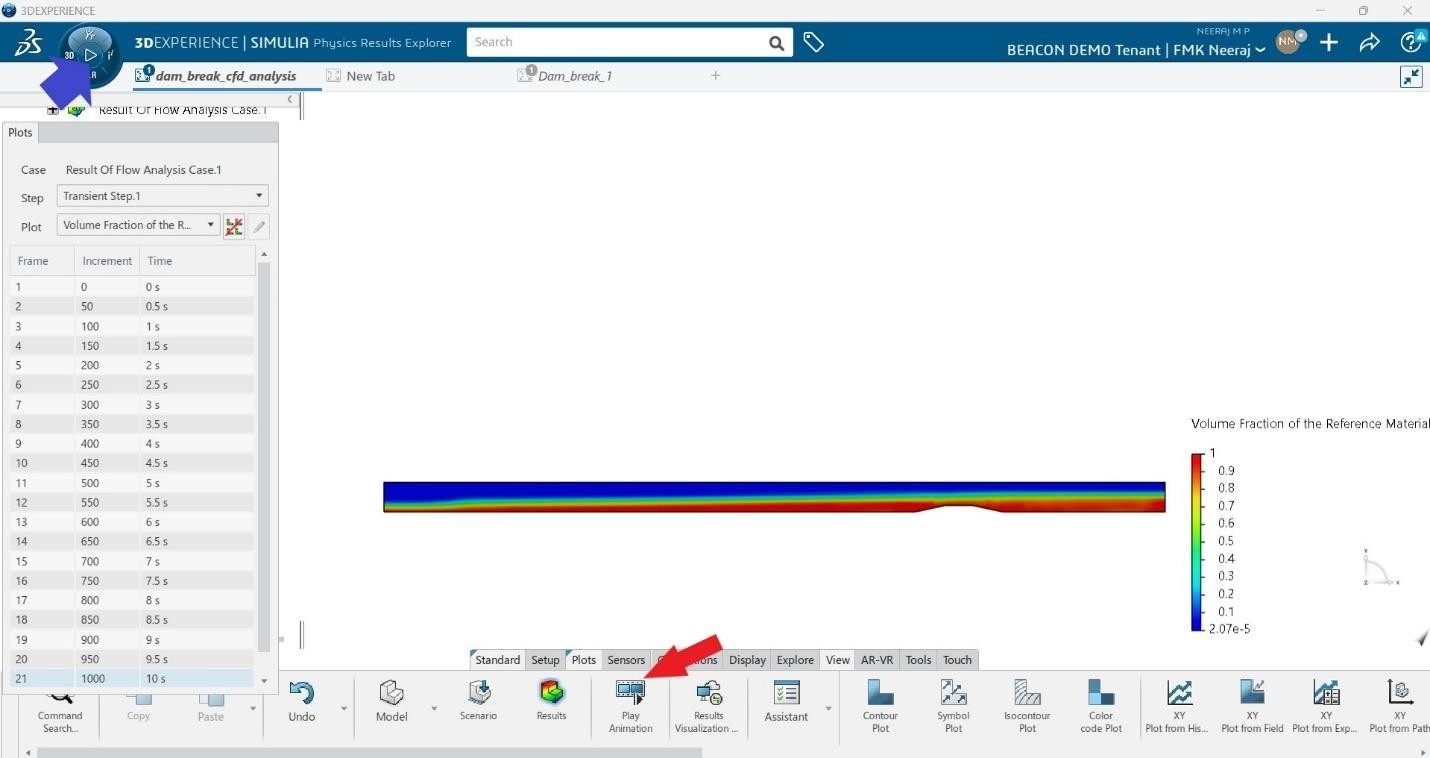
The plots dialogue box will be open, and by changing each option in it different results such as gauge pressure, velocity, velocity vectors, volume fraction of reference fluid (for multiphase fluid flows) can be viewed. Since this is a transient simulation, the plots at different times can also be viewed by clicking on the corresponding time plots dialogue box.
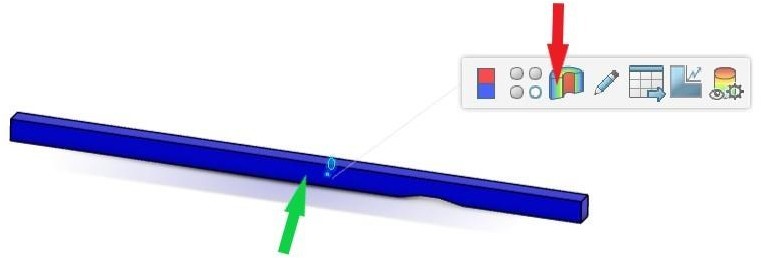
When you click on plots and select a variable (say velocity) it will show for the whole model. If you want to view it in a particular plane, click on the model and then plot sectioning tool. Then slide the corresponding arrow (for front plane z axis, right plane x axis and top plane y axis) to the required plane. When you click on any face of model and the sectioning, it will show the mid plane in the corresponding face by default.
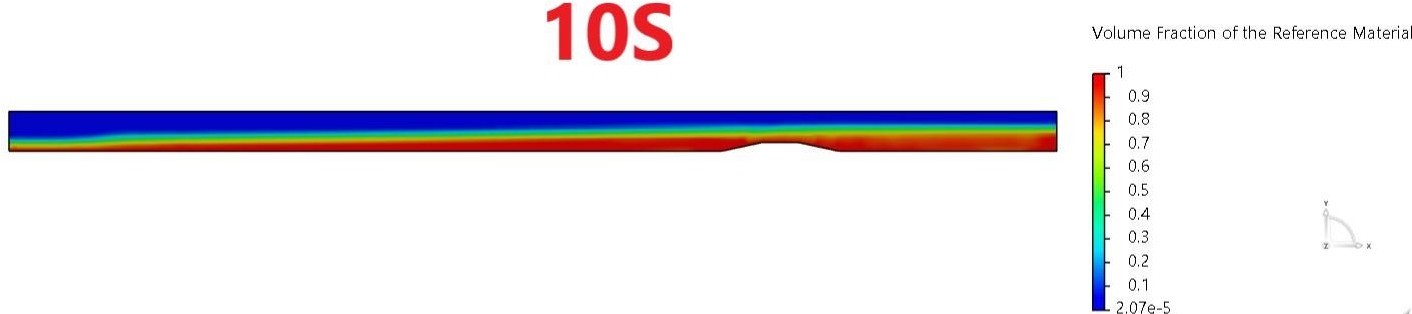
Now observe different plot types given below at 5s. You can view the legend at right side also.


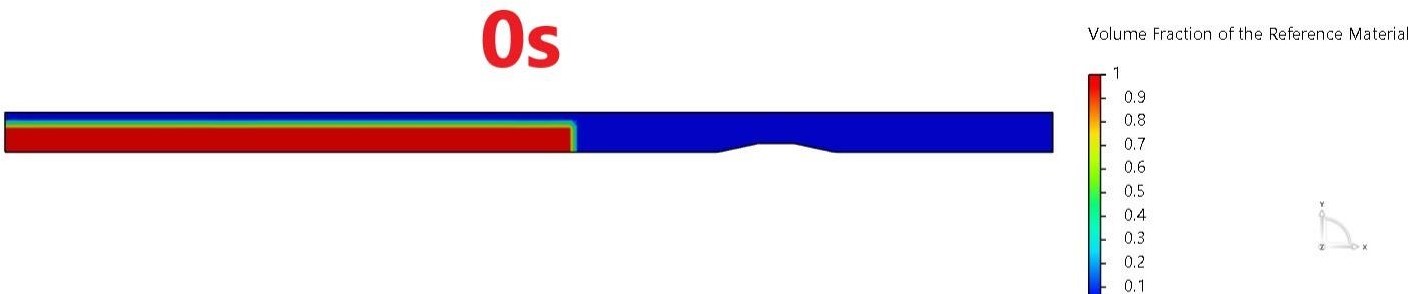
The main aim of this work is to simulate the breakage of reservoir (water column) and how water flows over the obstruction. It can be clearly visible from the volume fraction plot at different times as shown below.
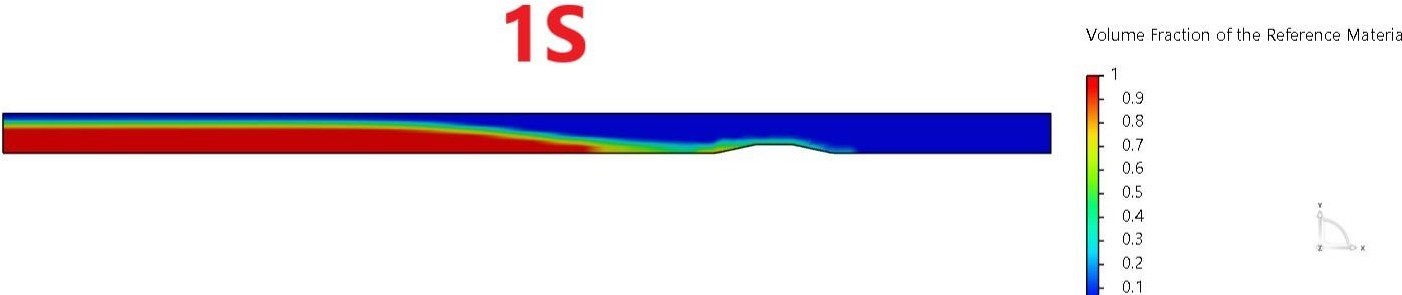
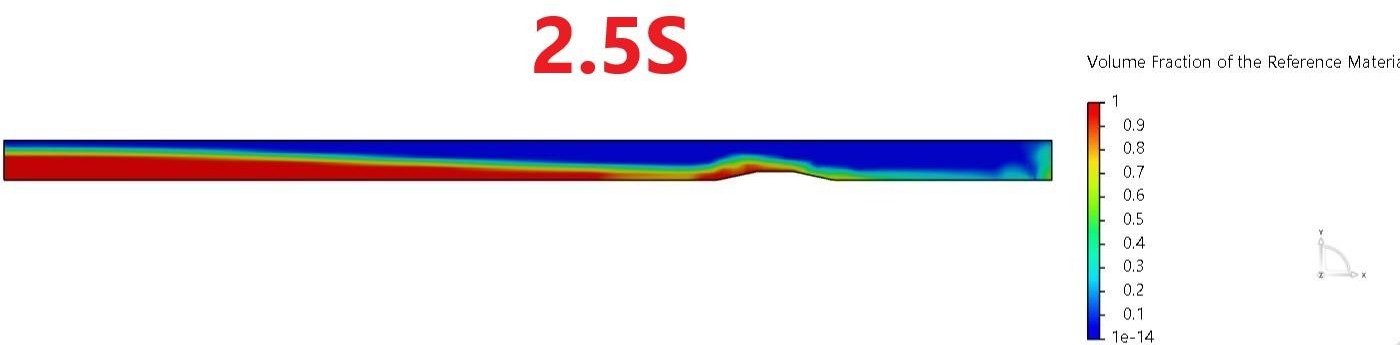
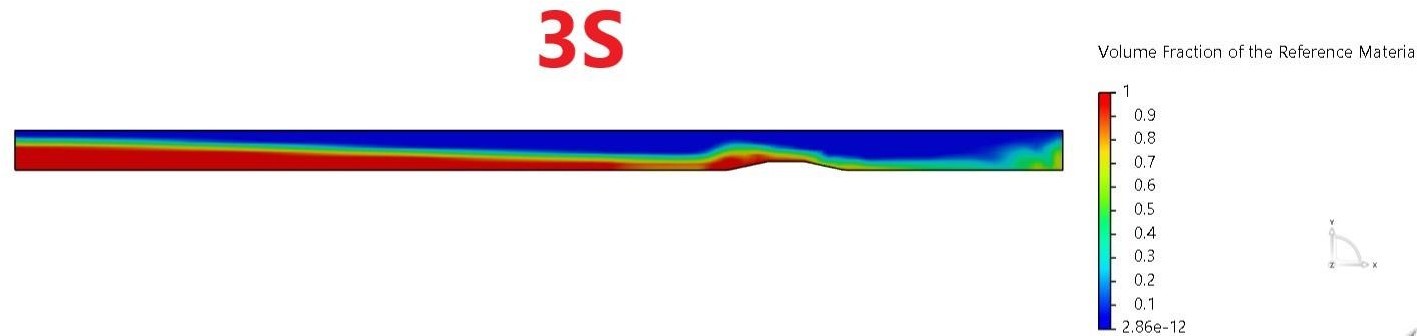
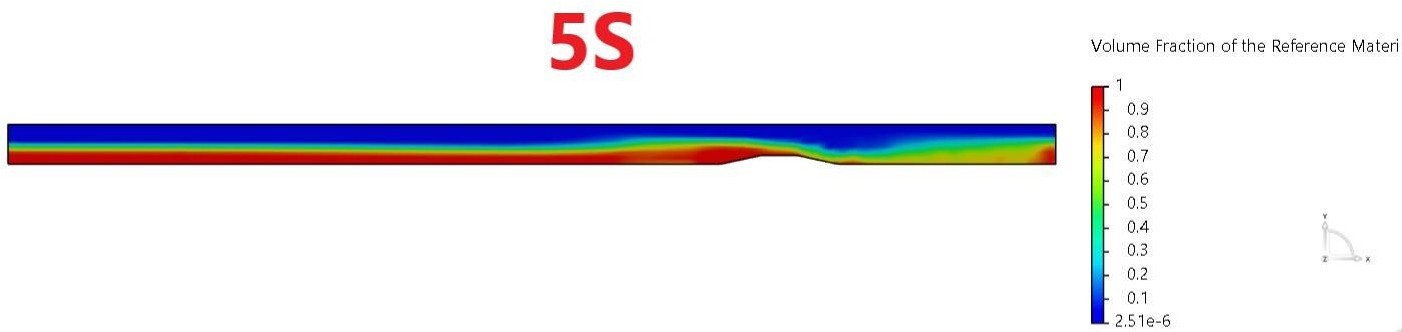
Different stages of dam break and water flow is visible from plots. It will be clearer from an animation video. You can play the animation, either by clicking on the play button in the compass (blue arrow in below figure) or by clicking play animation button in the command section. When you click play animation, the pause, stop, forward buttons appear in right side of command bar. From there in options, you can create animation files and export them as a video file as shown in below figures.

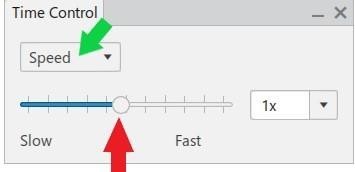
Click on time control and then you can control the speed of animation by clicking on speed. Drag the slider to 1x speed.
Now click on animation options (gear icon) and create animation video by clicking on the right button to edit and then control the size of animation (height and width). Also, you can vary playback options. From ‘browse’ icon you can browse the folder where the video should be saved. Click ‘save’ button below after this procedure. Now, the video created can be viewed below from the link.
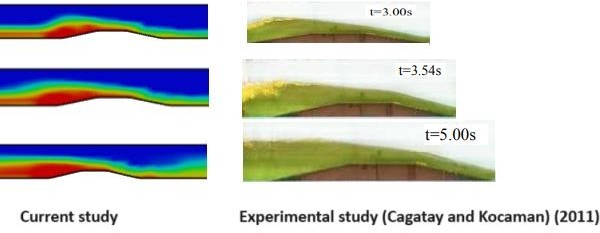
The flow pattern over the obstruction is compared with the experimental observations of Cagatay and Kocaman (2011) as shown below. The results seem to be matching.
Now save the study either by entering ‘ctrl+s’ in keyboard or by clicking  at the top right of window and then clicking save. The model is saved on the platform right now.
Close the platform and SOLIDWORKS section.
Note: The help and user assistance is available in the ‘?’ icon at top right of platform where you will get all details and assistance in simulation.
Lesson 4 is finished.
We Urge You To Call Us For Any Doubts & Clarifications That You May Have. We Are Eager to Talk To You
Call Us: +91 7406663589
 (No Ratings Yet)
#365/8, Ground Floor, "Hasmitha Avenue", 16th Main, 4th T Block East, Jayanagar, 4th T Block East, Pattabhirama Nagar, Jayanagar, Bengaluru, Karnataka 560041
Rated 4.7/5 with a total of 62 reviews
"CARAX" Building 4th Floor, 105/1/1/4, Next to Radha Hotel, Pune-Mumbai Xpress Way,Baner,Pune 411045
Rated 4.7/5 with a total of 17 reviews
801, 8th Floor, LODHA Supremus, I-Think Techno Campus,Kanjurmarg EAST - MUMBAI, MH, India – 400042.
Rated 5/5 with a total of 51 reviews
501, 5th Floor, Connekt Coworking Space, Gala Argos, Netaji Rd, Ellisbridge, Ahmedabad, Gujarat 380006
Rated 4.1/5 with a total of 7 reviews
Best Engineering Aids & Consultancies Pvt. Ltd. No 306, Karunaa Conclave, 3rd Floor, AD Block, Shanthi Colony, Anna Nagar, Chennai - 600040
Rated 4.6/5 with a total of 16 reviews
Flat no F1, first floor, Nakhate corner, Eknath rang mandir road,New Usmanpura, Aurangabad, 431005.
A-101, 1st Floor, The Hub Complex, opp. Shete Hospital, Mahatma Nagar, Parijat Nagar, Nashik, Maharashtra 422005.
Best Engineering Aids & Consultancies Pvt Ltd (BEACON) Wellwork Workspaces, L1 - 1017A,B, Lower Ground Floor,Vasavi MPM Grand, Ameerpet, Hyderabad, Telangana 500073