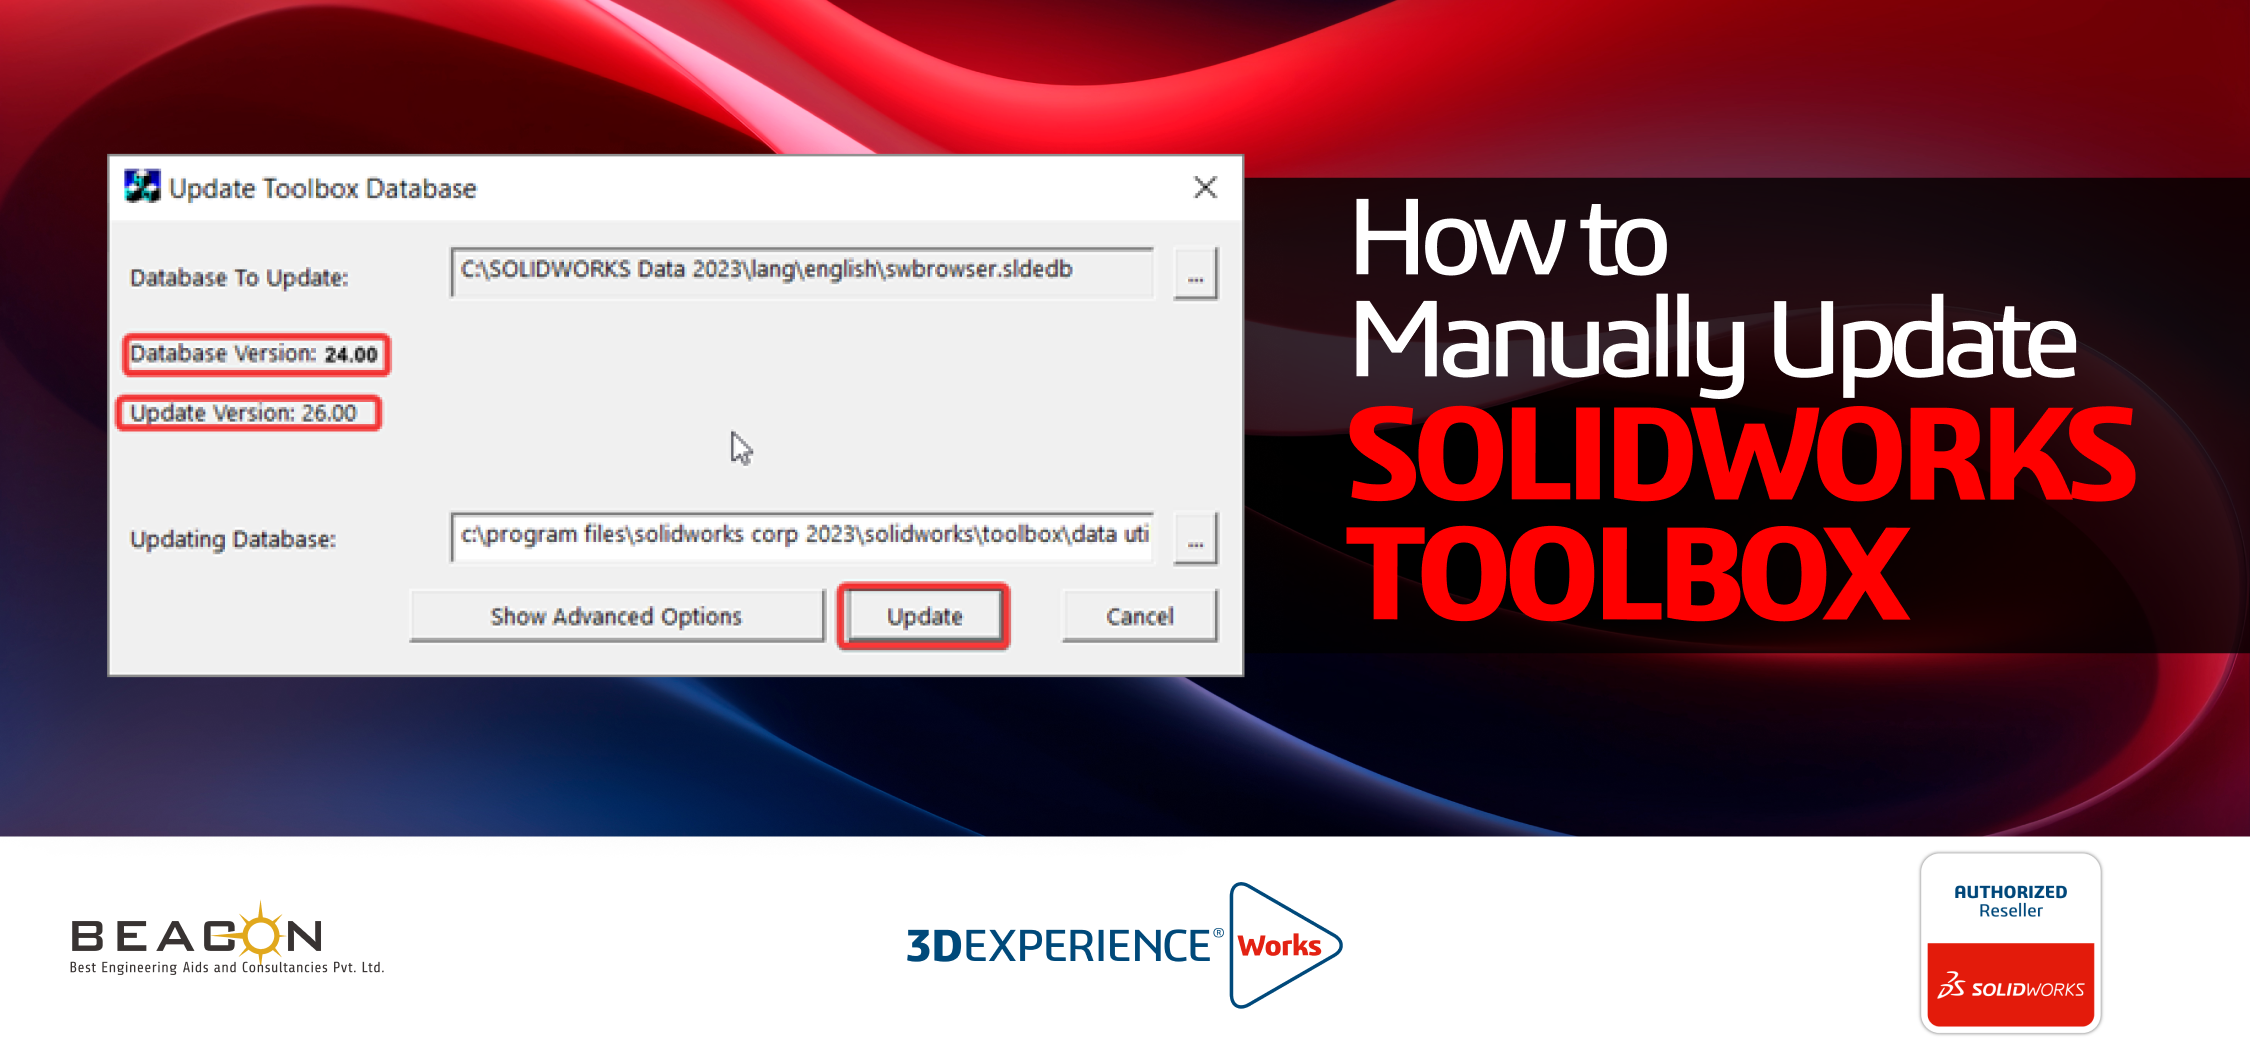


Are you encountering errors after updating your SOLIDWORKS version and finding that your existing toolbox isn’t up to date? This problem often arises when your toolbox is not in the default location but stored on a server or network drive. Fear not! This blog will guide you through the process of manually updating your SOLIDWORKS Toolbox to resolve this issue.
Step 1: Backup Your Existing Toolbox Before diving into the update process, it’s essential to safeguard your existing Hole Wizard and toolbox database. Navigate to the SOLIDWORKS data folder (typically located at C:\SOLIDWORKS Data 2023) and make a backup of the entire folder.
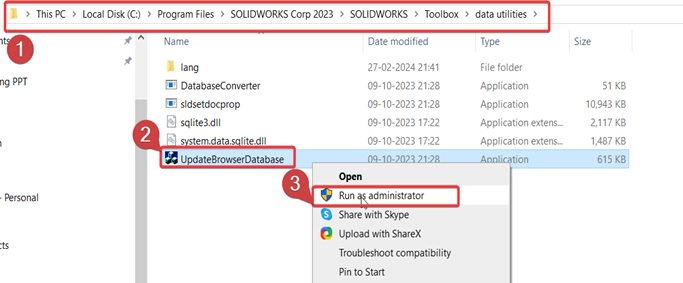
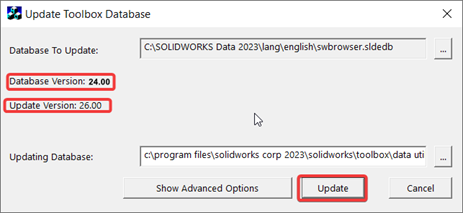
Step 2: Update Toolbox Database
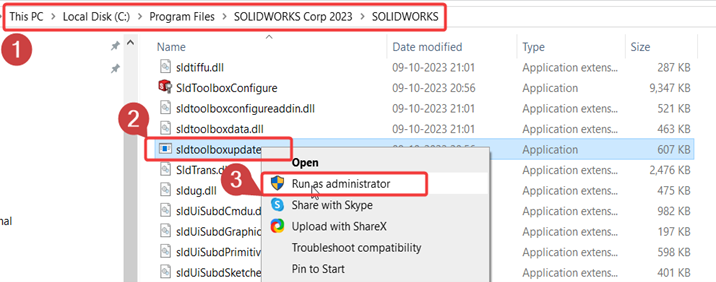
Step 3: Update Toolbox
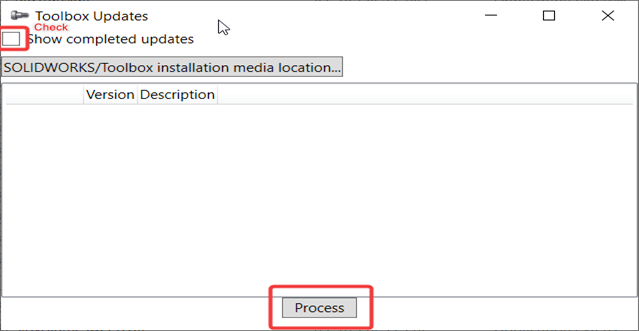
Step 4: Verify Toolbox LocationAfter completing the update process, double-check that your Hole Wizard and Toolbox file locations are correct. If needed, configure the updated SOLIDWORKS data folder in SOLIDWORKS by following these steps:
By following these steps, you can manually update your SOLIDWORKS Toolbox and ensure that it remains compatible with your updated SOLIDWORKS version, eliminating any errors or compatibility issues.
We Urge You To Call Us For Any Doubts & Clarifications That You May Have. We Are Eager to Talk To You
Call Us: +91 7406663589
Brigade Deccan Heights, 42, 14th Floor, 5th Mile, Tumkur Rd, Yeshwanthpur Industrial Area, Phase 1, Yeswanthpur, Bengaluru, Karnataka 560022
Rated 4.7/5 with a total of 62 reviews
#1120, 11th Floor, Solitaire business Hub - Baner, Balewadi High Street, Baner, Pune-411045
Rated 4.7/5 with a total of 17 reviews
801, 8th Floor, LODHA Supremus, I-Think Techno Campus,Kanjurmarg EAST - MUMBAI, MH, India – 400042.
Rated 5/5 with a total of 51 reviews
501, 5th Floor, Connekt Coworking Space, Gala Argos, Netaji Rd, Ellisbridge, Ahmedabad, Gujarat 380006
Rated 4.1/5 with a total of 7 reviews
Best Engineering Aids & Consultancies Ltd. No 306, Karunaa Conclave, 3rd Floor, AD Block, Shanthi Colony, Anna Nagar, Chennai - 600040
Rated 4.6/5 with a total of 16 reviews
Flat no F1, first floor, Nakhate corner, Eknath rang mandir road,New Usmanpura, Aurangabad, 431005.
A-101, 1st Floor, The Hub Complex, opp. Shete Hospital, Mahatma Nagar, Parijat Nagar, Nashik, Maharashtra 422005.
Best Engineering Aids & Consultancies Ltd (BEACON) Wellwork Workspaces, L1 - 1017A,B, Lower Ground Floor,Vasavi MPM Grand, Ameerpet, Hyderabad, Telangana 500073
2nd floor, Mokha Tower, Plot No.169, Mankapur Ring Rd, Trimurti Nagar, Nagpur, Maharashtra 440022


 Location